Free Shipping on Parts Orders Over $99

0

Your Cart is Empty

July 19, 2026 6 min read

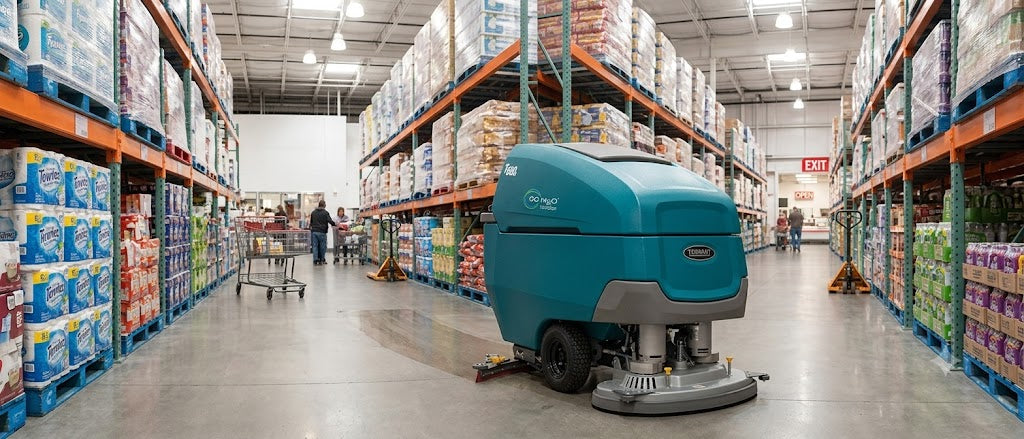
When an industrial walk-behind floor scrubber goes down, floor safety risks increase, productivity drops, and facility operations grind to a halt. Whether you are an end user trying to wrap up a shift, a facility manager looking to minimize downtime, or a field service technician performing on-site diagnostics, having a clear action plan is essential.

Using official service documentation for the Tennant T600 and T600e walk-behind floor scrubbers, we’ve broken down the 8 most common floor scrubber issues, their underlying causes, and step-by-step diagnostic fixes to get your machine back in service fast.

1. Battery & Charging Issues

Battery and charging problems are among the most frequent service calls for automated floor scrubbers.

Common Symptoms

  • The machine won't power up or shuts off prematurely.
  • On-board or off-board chargers fail to initialize a charge cycle.
  • Battery Discharge Indicator (BDI) flashes error warnings.

Diagnostic Steps & Solutions

  • Inspect Terminals: Check for corrosion, loose hardware, or damaged cables. Clean dirty terminals with a baking soda and water solution and torque battery connections properly.
  • Reset Circuit Breakers: Verify if Circuit Breaker #1 (CB-1, 2.5A) on the main control panel has tripped.
  • Verify Charger Profile: Ensure the charger algorithm matches the installed battery chemistry (Flooded Lead-Acid, Gel, AGM, TPPL, or Lithium-Ion). On Pro-Panel models, confirm the selected battery type under Supervisor Settings.
  • Inspect Battery Health:
    • Flooded Lead-Acid: Check fluid levels (add distilled water after charging) and test specific gravity using a hydrometer. Cell readings should not vary by more than 0.050.
    • AGM / Gel / TPPL: Check individual battery voltages with a multimeter—voltages should remain within 0.5V of each other.
    • Lithium-Ion Systems: Extreme temperatures can trigger the Battery Management System (BMS) safety shutoff. Charge only within safe ambient operating limits ( to  /  to ).

Relevant Fault Codes

  • 0xF100: On-board charger warning—check AC power source and output connectors.
  • 0xF101: Charger no-load detected—DC cable disconnected.
  • 0xF102: Charger over-temperature—allow machine to cool in a ventilated area.
  • 0x0D01 – 0x0D3C: Lithium-Ion BMS protection flags.

2. Leaking Water & Leaving Streaks

A floor scrubber that leaves streaks or leaks water creates serious slip-and-fall hazards on commercial floors.

Common Symptoms

  • Water trails left behind in turns or along straight runs.
  • Puddles forming under the machine when stopped or parked.

Diagnostic Steps & Solutions

  • Adjust Squeegee Pitch and Deflection: The rear squeegee blade should deflect evenly at a  angle across its entire width. Adjust the squeegee pitch shaft (clockwise lowers the blade tips; counterclockwise raises them).
  • Rotate or Replace Squeegee Blades: Tennant squeegee blades feature four usable edges. If an edge is rounded, nicked, or torn, flip or rotate the blade to a fresh edge.
  • Inspect the Recovery Tank Lid Seal: Check the dual-bulb rubber gasket around the recovery tank lid. Clean off dirt/debris and replace cracked or compressed gaskets to ensure proper air vacuum sealing.
  • Check Drain Hose Valves: Confirm the recovery tank drain hose plug is firmly sealed and the flow control valve is fully closed.

3. Water Pickup & Vacuum System Failure

If the vacuum system loses suction, floor scrubbers will leave wet, dangerous floors behind.

Common Symptoms

  • Squeegee passes over solution without lifting it off the floor.
  • The vacuum motor runs, but suction power is weak or non-existent.

Diagnostic Steps & Solutions

  • Check the Float Shut-Off: The safety float ball inside the recovery tank shuts off airflow when the tank is full or if excessive foam builds up. Empty the tank and clean the float screen.
  • Clear Hose and Squeegee Clogs: Remove the recovery hose and flush out any trapped debris. Clean out the debris tray/drip trap inside the squeegee assembly.
  • Check Vacuum Motor Circuit Breakers: Verify CB-5 (25A on T600e) or CB-2 (10A on T600) isn't tripped.
  • Inspect Motor Carbon Brushes: On conventional brush vacuum motors, check carbon brushes every 750 operating hours and replace them if worn down.

Relevant Fault Codes

  • 0x0501: Vacuum motor open circuit / disconnected wire harness at pin J4.
  • 0x0503 / 0x0506: Vacuum motor overcurrent or shorted load.

4. Solution System Issues (Not Putting Out Water)

When solution stops flowing, brushes run dry, leading to poor cleaning performance and accelerated pad wear.

Common Symptoms

  • Brushes rotate, but no clean water or chemical solution reaches the floor.
  • Solution flow is weak or intermittent.

Diagnostic Steps & Solutions

  • Check Fluid Levels & Settings: Verify the solution tank contains water and check that the solution flow rate setting on the control panel isn't set to zero.
  • Clean the Inline Solution Filter: Located under the machine frame. Unscrew the filter bowl counterclockwise, remove the stainless-steel mesh screen, rinse off buildup, and reassemble.
  • Test Solution Solenoid Valve (SV1): Inspect the 36VDC solution solenoid valve connections and wiring for corrosion or loose connections.
  • ec-H2O™ NanoClean System Check:
    • Red/Blue Blinking Light: Indicates the ec-H2O water conditioning cartridge has expired and requires replacement.
    • Solid Red Light: Indicates system lockout, often caused by chemical/detergent contamination inside the solution tank (ec-H2O systems require clean, plain tap water).

Relevant Fault Codes

  • 0x0301: Solution valve open circuit warning.
  • 0x0303 / 0x0306: Solution valve overcurrent or short circuit.
  • 0x0702 / 0x0711: ec-H2O module pressure switch or pump failure.

5. Brush Motor & Scrub Head Failures

If the scrub head doesn't lower or the brushes won't spin, the scrubber cannot clean.

Common Symptoms

  • Scrub deck remains raised or refuses to spin when the handle bail is engaged.
  • Uneven floor cleaning patterns or floor swirl marks.

Diagnostic Steps & Solutions

  • Check Operator Interlocks: Scrub decks only engage when the direction selector is in Forward/Reverse and the drive bail handle is actively pulled.
  • Reset Motor Circuit Breakers: Inspect and reset CB-2 (10A on T600) or CB-6 / CB-7 (30A on T600e).
  • Inspect Carbon Brushes & Drive Belts:
    • For disk and cylindrical motors, replace carbon brushes every 1,250 operating hours (or if shorter than 10 mm / 0.375 in).
    • On cylindrical scrub decks, inspect drive belts for wear, cracking, or loss of tension every 1,250 hours.
  • Adjust Cylindrical Brush Taper: If cylindrical brushes clean unevenly, adjust the idler plug (clockwise increases brush pattern taper; counterclockwise decreases it).

Relevant Fault Codes

  • 0x0101 / 0x0111: Scrub Motor 1 or 2 open circuit warning.
  • 0x0103 / 0x0113: Scrub Motor overcurrent/overload—reduce down pressure or switch to a less aggressive brush/pad.
  • 0x0201 / 0x0208: Scrub head actuator open circuit or mechanical stall.

6. Excessive Noise & Vibration

Loud or abnormal noises usually point to mechanical wear or foreign material caught in moving parts.

Common Symptoms

  • Knocking or grinding noises coming from under the scrub deck.
  • High-pitched whining during operation.

Diagnostic Steps & Solutions

  • Inspect Orbital Deck Isolators: On orbital scrub heads, worn or ruptured rubber isolator dampeners cause intense vibration and metal-on-metal clattering. Replace damaged isolators immediately to prevent severe structural damage to the deck housing.
  • Clear Cylindrical Brush Housings: Debris like plastic banding or wire can wrap around drive hubs or idler end plates, generating loud squealing or friction. Clear debris from the underside of the deck regularly.
  • Check Vacuum Motor Bearings: A high-pitched screeching sound from the vacuum enclosure typically signals failing motor bearings.

7. Impact Damage & Drive System Lockouts

Physical impacts during transport or operation can trigger automatic safety lockouts in modern commercial scrubbers.

Common Symptoms

  • The machine turns on, but the drive propulsion system will not respond.
  • Machine drags or resists manual pushing.

Diagnostic Steps & Solutions

  • Check Emergency Stop (E-Stop): If the red E-stop button on the control console was engaged, twist the button clockwise to reset it.
  • Inspect Manual Brake Bypass Lever: If the transaxle parking brake bypass lever was moved to manually push the machine, the controller will lock out electric drive motor function. Ensure the brake lever is reset to normal operating position.
  • Inspect Casters & Drive Wheels: Check front drive tires and rear caster assemblies for physical alignment, impact damage, or wrapped debris. Lubricate caster swivel bearings every 100 operating hours.

Relevant Fault Code

  • 0xFFF0: Emergency Stop Activated or Parking Brake Mechanically Bypassed.

8. Quick Reference: General Electrical & Controller Error Codes

Fault Code

Cause

Recommended Action

0x0900 / 0x0910

Propel i-Drive Fault / Tripped Breaker

Check 40A main circuit breaker (CB-4); inspect drive transaxle motor wiring harness.

0x0902

High Throttle Fault

Bail handle was engaged before turning the key switch ON. Release bail handle and turn key OFF/ON.

0xFF20

Scrub Controller CAN Bus Comm Fault

Loss of communication between system boards. Inspect main wiring harness connectors for corrosion or pin displacement.

0x8001 / 0x8002

Feature Disabled Remotely

Feature locked via admin/telemetry settings. Contact an authorized service dealer.

Need Professional Service, Parts, or Advice?

Even with a comprehensive troubleshooting guide, complex electrical issues or major mechanical overhauls require certified technician support. If you need replacement OEM parts, squeegee blades, or on-site service for your floor maintenance equipment, contact our service team today or explore our online parts catalog! Shop Tennant T600e/T600 Parts