Free Shipping on Parts Orders Over $99

0

Your Cart is Empty

July 19, 2026 6 min read

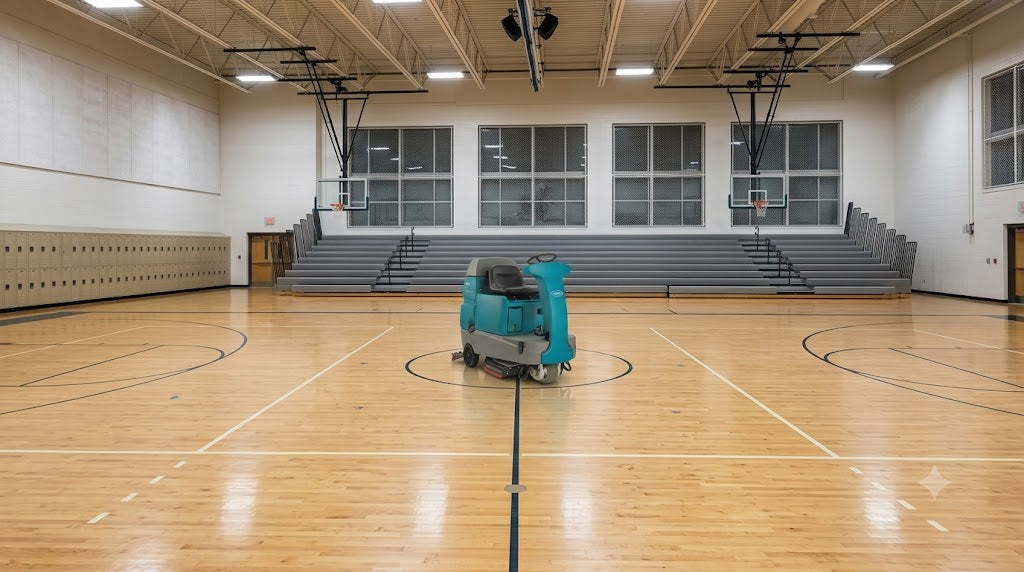
Whether you are managing a warehouse, operating in a commercial facility, or performing field maintenance, keeping your floor scrubber operating at peak performance is essential to maintaining clean, safe, and professional-looking floors. Down time on equipment like the Tennant T7 Battery-Powered Ride-On Floor Scrubber can lead to safety hazards, dirty floors, and costly service calls.

To help facility managers, end-users, and field technicians diagnose and resolve issues quickly, we have put together this comprehensive, easy-to-read troubleshooting guide covering the most common floor scrubber problems and how to fix them.

1. Battery & Charging Issues

Battery and power delivery problems are among the most frequent issues reported by scrubber operators. A machine that won't turn on or loses charge quickly disrupts your entire cleaning schedule.

Common Symptoms:

  • Machine will not power on.
  • Short run-time or battery gauge drops rapidly during use.
  • Charger displays error codes or abnormal indicator lights.

Troubleshooting Steps & Quick Fixes:

  • Check the Charger Interlock: Ensure the charging plug is completely disconnected from the wall before turning the key. If the key switch is turned ON while plugged in, the machine will trigger a 9-beep interlock alarm and disable propulsion.
  • Inspect Electrolyte Levels (Lead-Acid Batteries): Check electrolyte levels in every cell before/after charging or every 50 hours of operation. Fill with distilled water only until plates are submerged—do not overfill.
  • Clean Terminals: Inspect battery terminals every 200 hours for corrosion or loose connections. Clean terminals using a wire brush and a solution of baking soda and water.
  • Understand On-Board Charger Fault Codes:
    • bat: Loose or damaged battery cable—inspect physical connections.
    • E01: Exceeded maximum allowed battery voltage.
    • E02: Charger safety thermostat exceeded max temperature—check for blocked cooling vents.
    • E03: Maximum charge time exceeded due to a sulfated or failing battery.
    • SCt: Safety timer exceeded—replace the battery bank.
  • Verify Charger Algorithm/Profile: Ensure the on-board charger displays Acd for wet/flooded lead-acid batteries or GEL for sealed gel batteries when plugged in. Running the wrong profile will severely shorten battery life.

2. Poor Water Pickup & Trailing Water (Leaving Streaks)

When a floor scrubber leaves behind trails of dirty water or streaks, it creates immediate slip-and-fall safety hazards for employees and visitors.

Common Symptoms:

  • Water streaks or puddles left in turns or straight passes.
  • Suction feels weak at the rear squeegee.
  • The vacuum fan shuts down unexpectedly during operation.

Troubleshooting Steps & Quick Fixes:

  • Check the Recovery Tank Float Switch: When the recovery tank is full, the float sensor disables the vacuum fan motor to prevent water from entering the vacuum fan. Empty the recovery tank and clean the float screen/sensor regularly.
  • Inspect Vacuum Seals and Hoses: Check the recovery tank cover gasket for cracks, gaps, or flattening. Ensure the suction hose connected to the rear squeegee is free of clogs, tears, or loose connections.
  • Clean the Vacuum Fan Filter: Check and clean the vacuum fan filter daily to maintain full suction power.
  • Adjust Squeegee Deflection & Leveling:
    • Blade Deflection: Squeegee blades should curl back approximately 12 mm (0.5 in) on smooth floors and 15 mm (0.62 in) on rough floors. Adjust using the caster height jam nuts.
    • Leveling: If streaks appear at the tips or the center of the squeegee path, turn the squeegee leveling adjustment bolt (located behind the suction hose) counter-clockwise to increase end deflection or clockwise to decrease it.

3. Solution Flow Problems (Not Putting Out Water or Leaking)

If your floor scrubber isn't applying cleaning solution—or if it is leaking water on the floor—the cleaning cycle becomes ineffective.

Common Symptoms:

  • Dry scrubbing path or inconsistent solution delivery.
  • Water leaking under the machine when stopped or off.

Troubleshooting Steps & Quick Fixes:

For Conventional Scrubbing:

  • Check Water Level & Console Settings: Confirm the solution tank has water/cleaning chemical and the solution flow button on the control panel is turned on.
  • Clean the Inline Solution Filter: Drain the solution tank and unscrew the inline filter housing located under the machine. Clean out debris and sediment blocking the screen.
  • Test the Solenoid Valve: Verify that the solution solenoid valve (SOL2) opens when propelling forward with scrubbing engaged.

For FaST (Foam Scrubbing) Systems:

  • Check the FaST Control Switch: Confirm the FaST button is active on the control panel.
  • Inspect the FaST-PAK Cartridge: Ensure the detergent container is properly connected and not empty. Soak the quick-disconnect fitting in warm water if soap residue has built up and restricted flow.
  • Prime the System: Allow the system to run for a few minutes after installing a new detergent pack to bleed air out of the lines.

4. Squeegee Blade Wear & Replacement

Squeegee blades are high-wear maintenance items. Damaged blades directly impact drying performance and cause unwanted streak patterns.

Common Symptoms:

  • Worn, torn, or rounded edges on rear or side squeegee blades.
  • Squeegee housing catching or dragging against baseboards and walls.

Troubleshooting Steps & Quick Fixes:

  • Rotate Rear Blades: The Tennant T7 rear squeegee blade features four usable wiping edges. If one edge wears down, remove the blade retainers, flip or rotate the blade to an unused edge, and re-install.
  • Replace Damaged Side Squeegees: Inspect side squeegee blades daily. If cracked or worn, slide the side blade retainer off and replace with new blades.
  • Adjust Outer Guide Rollers: Set the bumper guide rollers on the outer edges of the squeegee assembly to ensure smooth deflection along walls without catching on obstacles.

5. Scrub Head & Brush Motor Issues

Scrub brushes or pads do the heavy lifting when removing grime and dirt. Brush motor faults usually indicate mechanical strain or obstruction.

Common Symptoms:

  • Scrub brushes fail to spin.
  • Poor cleaning performance or uneven scrub patterns.
  • Over-current fault indicator blinking on the control panel.

Troubleshooting Steps & Quick Fixes:

  • Verify Safety Interlocks: Brushes will only spin when the machine is actively moving forward or backward with the scrub system engaged. They will not rotate while stationary.
  • Clear Jams & Check Wear: Inspect drive hubs daily for wrapped wire, string, or shrink wrap. Replace disc brushes when bristles measure under 10 mm (0.38 in), or cylindrical brushes when under 15 mm (0.62 in). Always replace brushes in pairs.
  • Inspect Cylindrical Drive Belts: Check belt tension on cylindrical scrub decks every 100 hours. Loose or snapped drive belts prevent rotation and cause uneven floor cleaning.
  • Diagnose Brush Fault LEDs:
    • Blinking FAULT Light + Pressure LED #1: Over-current (>30A) detected on Left/Front Brush Motor.
    • Blinking FAULT Light + Pressure LED #3: Over-current (>30A) detected on Right/Rear Brush Motor.
    • Fix: Lower the down-pressure setting, remove wrapped debris, or check motor carbon brushes for wear (recommended every 500 operating hours).

6. Understanding Diagnostic Beep Codes

The Tennant T7 uses system horn beep codes to signal operator interlocks or system faults when the directional switch is in FORWARD:

Beep Pattern

Cause / Fault Condition

Required Action

1 Beep Cycle

Backup Alarm Active

Normal warning signal when machine is in REVERSE.

2 Beep Cycle

Seat Switch Interlock

Operator must be fully seated to propel or scrub.

4 Beep Cycle

High Pedal Disable

Propel pedal was depressed while turning Key ON. Release pedal and cycle key.

5 Beep Cycle

Throttle Sensor Fault

Invalid throttle signal; inspect pedal potentiometer wiring.

6 Beep Cycle

Parking Brake Fault

Incorrect brake voltage detected by main board.

7 Beep Cycle

Parking Brake Disconnected

Open circuit on parking brake solenoid; check rear connector.

8 Beep Cycle

Emergency Stop Activated

E-stop switch is pushed in. Twist to reset switch and cycle key switch OFF/ON.

9 Beep Cycle

Charger Plugged In

Charger cord connected to wall or machine. Disconnect plug before operation.

7. Machine Mechanical Noise & Manual Towing Instructions

Unusual grinding, screeching, or dragging noises require immediate attention to avoid damaging key drive components.

Common Symptoms:

  • Screeching or grinding noise coming from the front drive wheel.
  • Machine locked up and cannot be pushed manually.

Troubleshooting Steps & Quick Fixes:

  • Drive Motor Brake Dragging: Screeching noises near the front drive wheel often stem from an incorrect electronic brake air gap (factory specification is 0.20 mm / 0.008–0.012 in) or a worn brake rotor pad (<4 mm total thickness). Clean out debris build-up in the air gap.
  • Inspect Motor Carbon Brushes: Check carbon brushes on the propel motor, vacuum fan motor, and brush motors every 500 operating hours. Replace brushes if worn shorter than 12–13 mm.
  • How to Disengage Brake for Towing/Pushing:
    1. Disconnect the main propel motor wire harness to protect the electronic controller board from back-feeding voltage.
    2. Insert a small screwdriver tip between the electronic brake lever and hub to mechanically release the brake pad.
    3. Push or tow the machine slowly (do not exceed 2 mph / 3.2 km/h).

Need Professional Service or Parts for Your Tennant T7?

While many routine maintenance tasks and operational checks can be completed on-site, severe electrical faults, motor failures, or deep hydraulic/solenoid issues require trained equipment technicians.

If you need OEM replacement parts, new squeegee blades, battery chargers, or expert field service for your floor scrubbers, contact our service team today or browse our online catalog to get your equipment back to peak operational efficiency! Shop Tennant T7 Parts