
Your Cart is Empty
No need to buy OEM and pay 2x the price.
Nilfisk Advance VA75006, Pick-up tool mounting plate
FactoryCat/Tomcat 290-234A, Spare Key Set of 2 Keys
Glad I was able to purchase this item.
Free Shipping on Parts Orders Over $99
Free Shipping on Parts Orders Over $99

July 16, 2026 6 min read
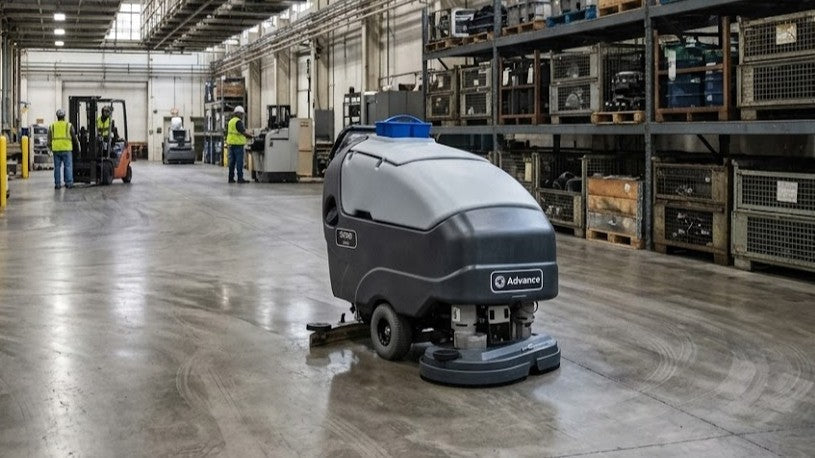
Commercial automatic floor scrubbers are the workhorses of facility maintenance. But when a walk-behind unit like the Advance SC750 or SC800 goes down, operations halt, labor costs rise, and safety risks increase.
Because an autoscrubber is engineered to recover 100% of the water it dispenses, leaving standing water or streaks behind is simply not an option. Whether you are dealing with a machine that won’t turn on, a squeegee leaving streaks, or an active electrical fault code, this field-tested troubleshooting guide will help you diagnose the issue fast and get back to clean, dry floors.
Battery issues are the leading cause of premature machine failure and unexpected downtime.
Check the Main Harness: Verify that the large red Main Battery Pack Connector is completely pushed together and seated tightly.
Reset Tripped Breakers: Look at the rear electrical panel. If the 10-Amp control circuit breaker or the 30-Amp wheel drive circuit breaker has popped out, press it firmly to reset.
Verify Low Voltage Cut-Out (LVCO) Settings: The main controller must be programmed specifically for your battery type. Wet lead-acid batteries cut out early at 20.55V, but AGM/Maintenance-Free batteries require a higher alternate cut-out setting of 21.75V to prevent cell damage.
Critical Mistake: Running AGM batteries on a "Wet" controller profile will over-discharge the cells, permanently damaging them and severely shortening their lifespan.
Test for Weak Cells: Charge the batteries continuously for at least 16 hours. Run the scrub system while using a voltmeter to test the voltage across each individual 6V battery cell. If any single block measures 1 to 2 volts lower than the rest of the pack, it has a bad cell and must be replaced.
Never Mix Batteries: Do not drop a single brand-new battery into an old set (50+ cycles). Old batteries require higher finish rates; a new block introduced to this environment will be chronically overcharged and fail prematurely.
The Charger Interlock Circuit: On-board chargers (Delta-Q or S.P.E.) use a safety mechanism that cuts main board power when the AC cord is plugged into the wall, ensuring operators can’t drive off while tethered to an outlet. If the machine stays entirely dead after you unplug it, the internal interlock relay inside the charger is likely welded or stuck open.
An autoscrubber must leave the floor completely dry to prevent slip-and-fall hazards. If your machine is leaving water behind, check these three areas immediately.
Flip Worn Squeegee Blades: Inspect the trailing edge of the rear squeegee blade. If it’s nicked, torn, or rounded off, remove the tool and flip the blade to a fresh, sharp wiping edge, or replace it entirely.
Correct the Tool Angle: The blade should bend over slightly and touch the floor evenly across its entire width while moving forward. Adjust the trailing tilt using the center Squeegee Adjustment Knob.
Clear Debris Trapped Under the Blade: Wood splinters, hair, or small fragments frequently get caught in the squeegee channel. This lifts the rubber edge just enough to let thin streams of dirty water escape the vacuum suction.
Flush the Vacuum Hose: Inspect the thick, corrugated squeegee vacuum hose for internal clogs or sharp kinks. Remove it entirely and flush it out with clean water.
Inspect the Tank Gaskets: Check the thick rubber Recovery Tank Lid Gasket. If it is compressed, cracked, or misaligned, the vacuum will pull air from the top of the machine rather than the floor.
Cap the Drain Hose: Ensure the clear plastic cap on the lower end of the recovery tank drain hose is twisted completely shut and tightly sealed.
If the vacuum motor suddenly jumps to a high-pitched scream, the ball float inside the recovery tank has sealed off the chamber.
If this happens when the tank is actually empty, clean any sticky residue or dried soap buildup from the ball and its plastic protective cage to keep it from getting stuck in the "shut-off" position.
If the brushes are dry and no water or detergent is reaching the floor, check the delivery line step-by-step.
Clean the Solution Intake Screen: Locate the inline solution filter underneath the lower chassis frame near the brush deck. Twist off the clear bowl cover and thoroughly wash out any accumulated sediment or debris.
Open the Manual Isolation Valve: Make sure the manual mechanical solution shut-off valve handle points completely straight, inline with the plumbing hose.
Decode Electrical Faults: * Code 8 (ST Blink 1,5): Over-current trip on the solution solenoid circuit (a shorted wire or faulty valve coil drawing > .7A)
Code 30 (ST Blink 2,3): Open solution solenoid circuit. The controller sent power but detected zero current flow, indicating a broken circuit wire or a failed internal solenoid winding.
Check the Interlocks: The brushes will not rotate if the machine is completely stationary. The Main Machine Controller must receive an active "Machine Moving Signal" from the electronic Traction Controller (forward or reverse) before it will close the primary brush contactor relay.
Inspect Carbon Brushes Annually: Walk-behind brush motors contain 4 internal carbon brushes that wear down over time. Check them visually every 500 operational hours. Replace them immediately if their length drops below 3/8" (9.5 mm).
Warning: Running a motor with excessively worn carbon brushes causes severe internal electrical arcing that permanently destroys the expensive commutator surface.
Over-Current Protection Trips (Code 5 / ST Blink 1,3): This indicates a severe amp spike on the deck (>60 A) Turn off the key immediately and check for plastic banding tape, wire wrap, or thick string tangled tightly around the rotating motor shafts or drive hubs.
Maintain Deck Bumper Wheels: Disc decks feature structural outer plastic guard covers and heavy bumper guide wheels. Clean and lubricate these bumper wheels monthly so they spin freely on impact rather than catching or snapping their fasteners against walls.
Check for Bent Lift Linkages: If the front deck strikes a structural pole at high speed, check the mechanical brush linkages and the electric head actuator for binding. If the internal lift rod gets bent, it won't trigger the built-in micro-switches, throwing an automatic tracking error code.
Lubricate the Squeegee Mechanism: Prevent bent brackets by applying a light machine oil monthly to the squeegee lift linkage pivot points, the mount angle adjustment knob threads, and the small squeegee tracking guide wheels.
Disconnect the main heavy battery plug before working. Use a specialized key extraction tool or thin needle-nosed pliers to pull the broken fragments out.
Replacement Warning: If you replace a damaged key switch on a model equipped with the optional on-board charger tracking loop, pay strict attention to the wire positions behind the panel. Chargers tied into the SPE Interlock Relay loop require specific pin configurations (such as moving specific yellow/brown leads) to function properly and prevent the machine from starting while plugged into the wall.
When you need to determine if a component failure is a bad motor or just a faulty wire/control switch, you can bypass standard driving interlocks using Service Test Mode.
| Control Panel Style | How to Enter Service Test Mode |
| Toggle Switch (ST) Panels |
1. Turn the key off. 2. Hold all 3 toggle switches (Vacuum, Scrub, Solution) fully UP simultaneously. 3. Turn the key back on and hold for 3 seconds until all display LEDs cycle. You can now toggle individual rocker switches to force outputs (like spinning the brushes on a stationary machine). |
| Membrane Style Panels |
1. Turn the key off. 2. Hold down the Scrub ON/OFF Switch and the Vacuum/Wand Switch together. 3. Turn the key to the ON position and hold for 3 seconds until "Programming Options" appears. 4. Navigate down and select "SERVICE TEST MODE" to view real-time battery voltage and live motor amp draws. |
Regular preventative maintenance keeps your floors clean and your facility safe. For replacement squeegees, filter screens, or advanced component diagnostics, contact our service team today!
Browse our full inventory of Advance SC750/SC800 replacement parts herecontact our support team today if you need assistance
Sign up to get the latest on sales, new releases and more …
No need to buy OEM and pay 2x the price.
Nilfisk Advance VA75006, Pick-up tool mounting plate
FactoryCat/Tomcat 290-234A, Spare Key Set of 2 Keys
Glad I was able to purchase this item.
Fit perfectly and works just like OEM. Very pleased !